Thursday 15 May 2014

Toning down bleach blonde hair

Mood-lifter, vitamin D-provider and skin-browner, there's nothing better than a dose of sunshine. And I had days of it during my 9 months in Australia. The natural hair lightening was an added bonus and fairly quikly it had whooshed up from dark blonde to platinum, with just one half-head of highlights hairdressing appointment. Back in the UK though my tan quickly faded and soon those mousy roots were peeking through. 


This blog is about toning down bleach blonde hair, while keeping hold of those natural highlights, to create a multi-tonal effect that looks really natural. 


1. Step 1 - Buying the hair dye
I was really impressed with this dye, mostly because - as you will see below - the colour on the box is almost identical to how it came out on my head! The colour is 7.3 Florida / Honey Blonde and is by L'oreal Preference. It said you can leave on for 30 minutes maximum, but I didn't exceed 20 minutes because my hair was so light I knew it would grab colour easily.


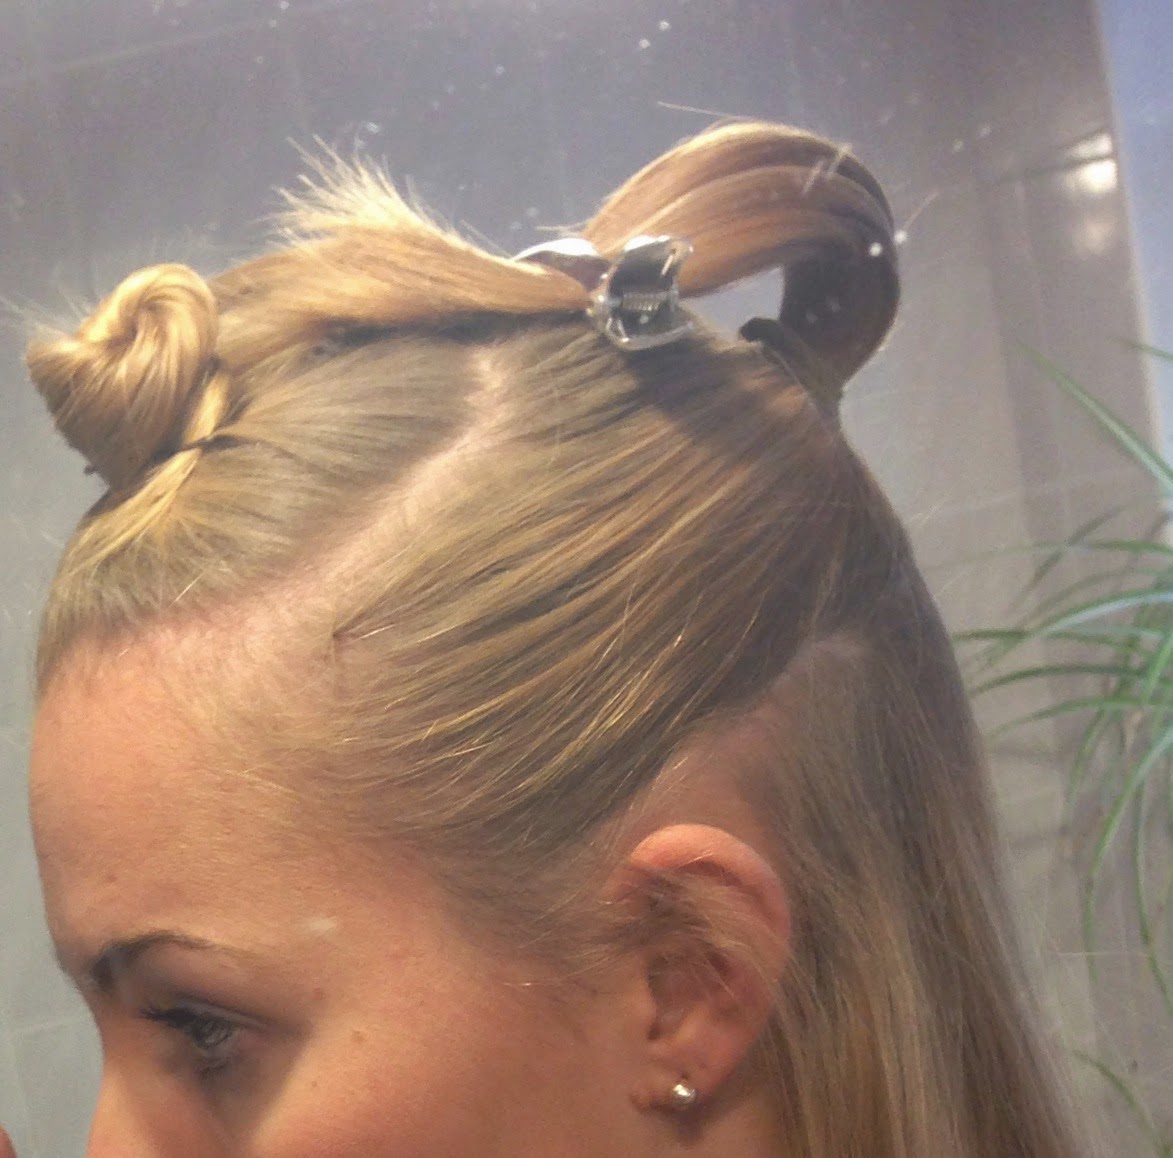
2. Step 2 - Prepping sections
 I divided my hair into three sections to make the dyeing process more manageable. The hair on the top of our heads is the most porous and on most people the lightest, so you want to tackle this section last. The underside of the hair should be darkest so this third should be done first and left on the longest. The hair is tied up to divide between 'roots' and 'ends'. More on that later...


3. Step 3 - All in the timing
I started with loading up colour on the bottom third, but only near the roots to start with. I wanted to keep some of the lightness in my hair and naturally the lightest parts of our hair are the tips (which lighten over time due to the sun). So on each of the three sections I only put the dye on until about half-way down the hair. It's easy to do this on the bottom third and the ponytail/bun on sections 2 and 1 mean you keep the bottom section 'clean' and out the way of the dye. You do the bottom third, then the middle third and then the top third (the half nearest the roots) in that order all within the first ten minutes.


4. Further coverage
In the next ten minutes you take the dye and beginning smoothing out further towards the tips - still keeping some of the areas of hair dry. For the bottom section this is pretty straight forward, but for the middle sections you will need to unfasten the ponytail and bun to get that dye further down the hairshaft. When you massage into the top section (leaving the tips dry) you will look like you are balding. I panicked all my hair was shedding but it was just a rather worrying illusion! This will take another 10 minutes.


5. The last five minutes!
In the last five minutes you take the remaining dye and slowly blend down the hair. You will cover the last cms of the tips seconds before you crank the shower on to shampoo and rinse.


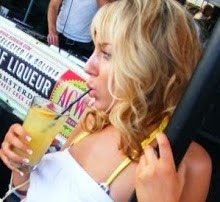
The finished result is a natural look from a dye job to correct a natural lightening which looked like a dye job! God being a girl is complicated. 

As the final pictures illustrates taking the time to divide sections and applying the dye at different times creates lots of different shades - but uses just one simple hair dye. You can also see the sections of hair that have been left until last retain that platinum lightness.


Sunday 9 June 2013

How to beat prickly heat...

It's the scurge of pasty Brits: the minute our bodies are faced with a hot, sunny day the skin becomes red, itchy and inflamed. No one quite knows why some of us get this irritating rash and for me my skin looks exactly the same - no redness - but the itchy sensation keeps me awake at night and I can't stop touching it. Cold showers, calamine and anti-histamines do fuck all. This year I went to palm desert (38 degree heat) expecting the worst, but well prepared for it. 

By doing the below I didn't even feel a prickle...

1. Don't block your pores
They say that prickly heat is caused by blocked sweat glands which leads to the release of histamine and inflammation so first of all i looked at my showering routine. I always use baby oil after showering, which is essentially liquid paraffin. So I decided to switch to a plant based oil. I used The Body Shop's Mango Beautifying Oil on this trip. This sweet smelling oil comes in a handy size for holiday and is now available in 5 further natural flavours. Dr Organic also do a variety of natural oils, such as coconut and argan oil. I started using the oil in the shower about a week before I left and through the trip. From working in healthcare I also know that oats are associated with relieving itching, which i thought might be useful if any itchiness started (it didnt) so I also invested in Aveeno Skin Relief Body Wash with oatmeal.

2. Assist your skin with internal antioxidants 
It is generally when your skin is on the cusp of burning that you feel those telltale symptoms coming back. I also know from working on the launch of Colladeen Visage that plant antioxidants can help to tackle the inflammatory response on a cellular level that comes from sun exposure. Colladeen Visage can give the skin an SPF 10 after 12 weeks and SPF 15 after 24 weeks. It literally helps your skin to tolerate sunlight better without burning. I started taking 4 weeks prior to going and I also combined with another potent plant antioxidant beta carotene. This ingredient is found in lots of sunscreens that claim to help you "tan faster" so my theory was if I was tanning quicker I would be spending less time in the sun - and therefore not getting my skin too hot.


3. It's probably your sun cream
I swear I only have to squirt a bit of Nivea sun cream on my chest in the midday sun and the familiar itching fires up. On weekend breaks where I haven't worn sun cream I haven't had any problem, so there must be a reason why. Perhaps these heavy chemical sun creams block the pores? Or maybe it's polymorphic light eruption (PLE) where light and cosmetics can create uncomfortable skin reactions? So I shelled out on some pricey sun cream from The Organic Pharmacy. It was worth it I think and I've ordered another tube. It felt nice every time I applied it: my skin felt soothed not scorched. I went for the SPF 18, but it goes up to 50. As a companion I also bought the tan accelerator - containing our old friend beta carotene, green tea extract (another colladeen visage extract) and other plant nutrients. It comes out brown and glittery. I applied every morning and sometimes doubled it up as an instant tan for legs in the evening. Mix it with foundation for a bronzed face by the pool. I can't praise The Organic Pharmacy sun care range enough to be honest.

4. My body hates me
Another theory, with PLE, is that as the body tans the body thinks the skin cells are a foreign body and start attacking it. This might be why the first exposure to sun gives a bad reaction which lessens as the summer goes on. Severe PLE sufferes have light therapy, but I didn't have access to such high tech facilities. Instead, controversially, I had 3 sunbed sessions - 8 minutes, 10 minutes and 12 minutes - to get my body used to tanning. I wouldn't recommend on a weekly basis but it makes sense to give your skin a little sneak preview of what it will be going through.


And that's it, no burning, no reddening, no itching and no prickling.


Friday 18 November 2011

Making your highlights last longer...

There's nothing more unsightly than big black tramlines on bright blonde hair 6 weeks after you're appointment at the hairdressers.

If you want to spread out your hair appointments saving you money and the condition of your hair there are a few nifty at-home tricks you could try...

1) Naturatint in Light Dawn Blonde - This mild colourant available from Holland & Barrett has no ammonia, a little bit of Hyrdogen Peroxide and natural extracts to gently lighten hair with minimal damage. Once you mix the colour up apply only to the roots. Then after twenty minutes apply the formula to the rest of the hair for a 'brightening effect'. 


2) John Frieda Sheer Blonde Lightening Spray - This isn't one to use on a daily basis as it does contain Hydrogen Peroxide and a hairdresser friend of mine says it can leave a greenish tinge on very light blonde hair if it's daily. I would advise just using on the roots. Simply spray the product onto wet hair and blow dry.


3) Batiste Dry Shampoo with a hint of colour (blond) - If these products containing 'Hydrogen Peroxide' all seem a bit scary, a simple and temporary measure is this dry shampoo. The lemon coloured powder will disguise roots until you can get to the salon again.


Thursday 27 October 2011

Credit Crunch Cut


 My absolutely pet peeve is long straight hair with no layers cut in. It has absolutely no movement and no volume at the roots. I like to keep the bottom half of my hair quite long (past shoulders) while snipping off the top half of my hair around ear length. This 'mushroom' shape means hair looks big on top and sleek underneath - and can be exaggerated with extra back combing.

Fixing your layers at home can be done surprisingly easily and a professional effect can be created with the help of a hairdressing blade. This sounds like it could end in a bloody mess, but salon suppliers sell blades with plastic handles and you can hold this tool as you might hold a kitchen knife. I have found a really cheap one £1.99 from this direct supplier (picture right).

The blade ensures that the ends are slightly uneven and look more natural than if you cut straight across with scissors. While a hairdresser can create this effect effortlessly with cutting techniques the blade is a 'quick fix'. By angling the blade you will feel it either cut very sharply, or it will appear to drag with resistance meaning it is blunter and not cutting as sharply.

To cut in the layer pull the desired section up in the air directly above your parting. For neatness I tie the section below up tightly in a bun so it doesn't interfere. By applying the blade in this position the hair that grows nearest the parting will be shortest and the hair that grows nearer your ears will be a about 2cm longer (creating that layered look).

Once you decide how much you want to lob off, push the grooves of the blade against the hair as if you were combing it. The 'teeth' on the blade will mean the hair isn't sliced off 'uniform' at one length. Slowly wriggle the comb pulling it towards the ceiling. You will feel tension as the hair is grabbed and cut. Soon the blade will have severed through the chunk of hair and you will be left holding the chopped off bit in one hand.

Brush the hair back up the air one more time. Does it look straight / even across the top or have you pulled tighter one side than the other? If the latter repeat again and be consicous about keeping the blade level throughout.


Wednesday 7 September 2011

Top skin brightening tricks

We have waved bye bye to flat, heavy powders and thick foundations that set like concrete. They leave skin looking dull and flat - and can be incredibly ageing.
Youthful skin has a plentiful store of sebum which is packed with lipids, these naturally moisturize the skin and are responsible for it's 'healthy glow'. (In fact in our teenage years we might even suffer from an overproduction of sebum which leaves us with hair you could fry chips on and a chin of pussy pimples).

But over time sebum production dwindles and we need to moisturise daily to keep that youthful glow. Plus there are an array of incredible products specially developed to give your skin a gorgeous glow. Here are my top 3:

No7 Skin Illuminator
This cheeky cream is peachy-bronze in colour when you squeeze it out. It has a brush for easy application and is ideal for sweeping across the cheeks, down the nose and up the side of your temples - anywhere with a contour - so when light hits your face it will reflect beautifully. It works best under a tinted moisturiser or light foundation, rather than on it's own.

Bare Minerals Mineral Veil in 'illuminating'
Mineral make-up is not only great for creating a subtle, polished finish it's kind to skin as the naturally sourced powder doesn't clog your pores. The Mineral Veil is truly a wonder product and if you only purchase one pot this winter make sure it's this one. I love the 'illuminating' shade, it looks quite pale in the pot, but brushed on it creates an incredible fresh-faced shimmer. Use on bare skin or over tinted moisturiser, I apply to my whole face with the silky smooth brush available from the same brand.

Benefit High Beam
This old favourite is a peachy-rose cream with an incredible shimmer to it. The bottle comes with an applicator brush and you simply dot on to the areas where you want to create super-healthy shine. I dot this just under the arch of my eyebrows, above and below my eyelids, on the brow bone and on the apples of my cheeks. This product is best applied after foundation I find and I dab the product gently until it blends in. A little goes a long way, so you can justify the Benefit price tag as it will last for months and months.


Thursday 24 February 2011

Is 'Rose Gold' the new black?


For someone who looks and sounds like a member of N-Dubz, you would be suprised by my expensive tastes, but I am totally in love with this new season Mulberry in perfect pink with Rose Gold fittings. The £1,787 price tag makes this 'Tillie' bag almost a grand more than it's black, brown and beige contemporaries. Is Rose Gold the new black?

Rose Gold (also known as Welsh or Russian gold) is actually cheaper to produce than usual gold as it is an alloy made from merging yellow gold with cheaper metal copper. It is hard to describe why it looks so much more desirable.

To get a rose gold accessory into your life without breaking the bank I love Michael Kors selection of watches which has about four models in this colour.

Friday 18 February 2011

Melanotan… the new smack

Illegal, fulfils your cravings and you inject it. No I’m not talking about heroin, it’s the latest craze in the beauty world – tanning injections.

We’re sick of smelling like stale bacon and don’t want the premature wrinkling brought on by sun bed abuse, so a quick shot in the backside and a Gisele Bundchen Brazilian Glow with no effort required is very appealing. But we thought beauty was pain? This goes against all our fundamental principles? What is it people say when something’s too good to be true? It’s probably not very good…

So what do the critics say?
“A letter to the British Medical Journal reports a ‘concerning’ new development. The letter says that two recent users of the drug had visited a skin clinic after moles on their bodies had rapidly changed in size and “darkened over a few weeks”. Both women had injected Melanotan I and II.”
(And when we say we’re worried about moles we don’t just mean an unsightly coco pop – we’re meaning ‘cancer risk’)
Nursing Times
“In addition to the possible side effects of Melanotan itself, there are also other potential dangers. Using non-sterile water to prepare the injections can cause serious blood infections, and sharing needles spreads blood-borne diseases such as HIV and hepatitis. Injections by untrained individuals can cause skin and tissue damage, and might result in permanent or life-threatening injury.”NHS
“The concern is over the unnatural stimulation to melanin production in order to darken the skin and that this may be found to cause cancer. Cancer cells are, put simply, mutations. Obviously changing your natural skin colour permanently in this way is in itself; MUTATION.”Blogger on Sofeminine.co.uk
“Melanotan has not been tested for safety, quality or effectiveness. Therefore it is not known what the possible side effects are or how serious they could be. For a start, because these products are being sold illegally, there is no way of knowing if they are what they say they are, and not contaminated by dangerous chemicals. Nor do we know how they might interact with any licensed drugs a person is taking. If you have used Melanotan and have experienced unwanted side effects, talk to your GP. They can give you advice and help you to fill out a yellow card, which allows the MHRA to keep track of the side effects of commercially available medicines.”Cancer Research UK
So we know there has been a pilot study (this means a small study with very limited numbers of people) – what did the doctors observe in clinic?
• Drowsiness
• Fatigue
• Mild nausea
• Severe nausea
• Yawning
• Spontaneous penile erections (yay!)

None of that sounds too troubling does it? Hmm except this bit at the end “two subjects had increased pigmentation in the face, upper body and buttock”. Increased pigment means darkening of the skin in patches and is not attractive or healthy looking.

There are tons of forum posts from people affected by this so if you do notice your tan is distributing unevenly – TAKE THAT NEEDLE OUT OF YOUR ASS!